Stiletto Queen: A Designer’s Real-World Embroidery Review
First Impressions: Bold, Playful, and Instantly Recognizable
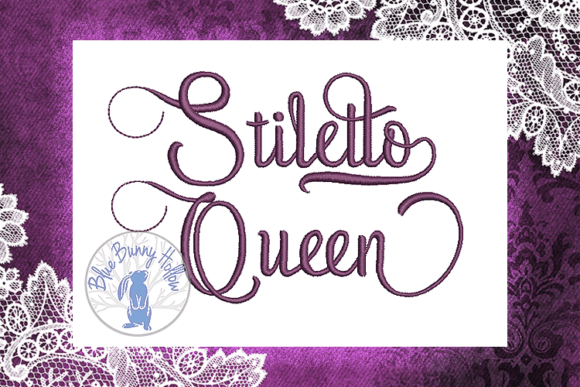
When I opened Stiletto Queen for the first time, I didn’t just see a shoe — I saw attitude. The silhouette is clean but confident: a high, slender heel, a gently curved toe, and subtle contouring that suggests movement and polish without overloading the shape with fussy detail. It’s not cartoonish, nor is it hyper-realistic — it lives in that sweet spot where machine embroidery thrives: strong outlines, balanced negative space, and intentional simplification. As an accessories-themed embroidery file, it leans into personality over precision — and that’s exactly why it works so well for handmade product lines.
A Tote Bag Test: Where Stiletto Queen Truly Shines
Last week, I stitched Stiletto Queen onto a natural canvas tote for a boutique pop-up. I used medium-weight cutaway stabilizer, 40-weight rayon thread, and a 5x7 hoop. The result? Crisp satin stitch along the heel curve, smooth fill stitch across the toe box, and just enough running stitch to define the strap — no bleeding, no puckering, no hesitation in the machine. Customers paused mid-aisle. One asked, “Is that *your* design?” — a quiet win for any craft business. That moment confirmed what I suspected: Stiletto Queen isn’t just decorative; it’s conversation-starting. It reads clearly at 3–4 inches tall, holds up on textured fabric, and adds instant character to otherwise minimal items like aprons, tea towels, or pillow covers.
Where It Fits — and Where It Needs Thought
Stiletto Queen performs best on stable, medium-to-heavy fabrics: denim jackets, cotton sweatshirts, twill tote bags, linen napkins, and structured baby blankets. It’s ideal for custom apparel and personalized gifts — especially for bridal showers, Galentine’s Day bundles, or small shop merchandise targeting fashion-forward makers. On stretchy knits (like t-shirts), I recommend light tear-away + adhesive spray — and always test first. On dark fabric, use bright white or metallic thread for contrast; on thin fabrics like voile or baby onesies, reduce stitch density if possible (check your file settings) and add lightweight fusible stabilizer behind the hoop.
That said, avoid cramming Stiletto Queen into tiny hoops (<4" wide) — the heel’s fine taper and strap details risk losing clarity. Curved surfaces like caps or curved pillow edges also demand careful placement and possibly re-hooping. And while it’s charming on nursery decor, skip it for newborn onesies unless you’re stitching a simplified version — delicate straps and narrow heels don’t always translate at sub-3-inch scale.
Design Integrity Meets Customer Trust
What makes Stiletto Queen feel professional isn’t just how it stitches — it’s how it makes the *finished product* feel. A well-executed Stiletto Queen elevates a plain tote from “generic gift” to “thoughtful, curated item.” That perception shift matters — especially for Etsy sellers and handmade shops where perceived value directly impacts pricing confidence and repeat buyers. I’ve seen customers pay 25% more for sweatshirts featuring this design versus generic florals, simply because it signals intentionality and brand voice. It also photographs beautifully in printable mockups — clean lines, strong silhouette, consistent scale — which boosts click-throughs and conversion in digital listings.
Practical Notes Every Embroiderer Should Run Through
- Test first — Always stitch Stiletto Queen on scrap fabric matching your final project’s weight and texture.
- Check thread color contrast — Especially on busy or dark backgrounds. A single-color version in black or gold often reads sharper than multi-tone variations.
- Review stitch density — Dense fills look lush on home décor, but may stiffen baby embroidery or lightweight apparel. Adjust if your software allows.
- Confirm hoop size — Know your design’s maximum width before hooping. Don’t force it.
- Inspect small details — Zoom in on the heel tip and strap attachment points. Are they digitized cleanly? No stray jumps or overlapping stitches?
- Mock it in black and white — This reveals balance issues faster than color previews.
- Use proper stabilizer — Cutaway for stretchy or heavy-use items; tear-away for stable home décor; fusible for layered or delicate fabrics.
- Verify licensing — If selling finished products or bundling Stiletto Queen as part of a commercial embroidery kit, confirm usage rights for your business model.
Final Thoughts: Not Just Another Shoe Design
Stiletto Queen stands out because it balances charm with craftsmanship. It doesn’t try to be everything — no floral wreaths, no glitter effects, no forced cutesiness. Instead, it commits to one idea: celebration of bold, feminine style — executed with embroidery-smart decisions. That focus makes it versatile across categories: holiday embroidery (think velvet stockings), wedding gifts (monogrammed clutch bags), boutique branding (coordinated staff aprons), and even small-batch patches for craft fair booths.
For designers building a library of reliable embroidery assets, Stiletto Queen earns its place not as filler, but as a go-to accent — the kind you reach for when you need visual impact without sacrificing stitch integrity. It reminds me why I love this work: when technique, taste, and real-world use line up, even a single stiletto can carry serious weight.